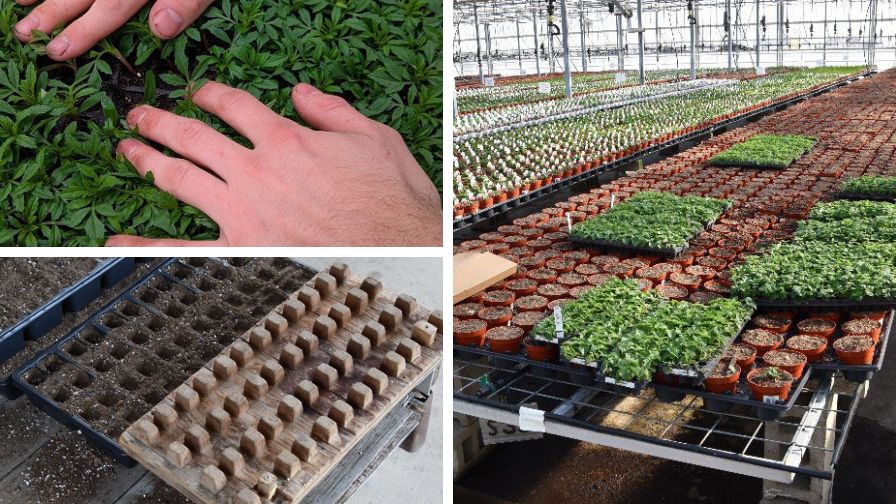
(Clockwise from top left) Upon arrival, inspect all plugs and liners for signs of damage, pests, or diseases. An example of pre-filling containers placing them at bench level in the greenhouse to optimize transplanting of plugs and liners. A flat-sized wooden dibble board. | W. Garrett Owen, OSU
In a recent e-Gro Alert, W. Garrett Owen of The Ohio State University covers the best practices to optimize the transplanting process of plugs and liners, especially relevant as growers plant for the rapidly approaching spring season. Here’s a look at the multiple steps to maximize crop establishment, uniformity, and overall greenhouse production efficiency.
1. Pre-Transplant Preparation
Preparation before the transplanting process begins is a critical but often overlooked step. Owen recommends inspecting “all plugs and liners for signs of damage, pests, or diseases,” by setting up a quarantine area for new plant material arrivals. After inspection, all plant materials should remain in the quarantine area for 24 to 48 hours to “acclimate to your greenhouse conditions,” thereby reducing transplant shock while improving establishment success rates. Lastly, all plug trays should be pre-irrigated two to three hours before transplanting, which “facilitates easier removal of plugs from the tray and significantly reduces the risk of root damage during the process.”
2. Removing Plugs and Liners
The removal of plugs and liners from trays requires careful and gentle handling “to preserve the integrity of the young plants.” Therefore, Owen recommends the use of a dibble board, plug popper, or other handheld tools to first “loosen tightly rooted plugs from the bottom of the tray,” minimizing root disturbance. Additionally, plants should never be pulled out by their stems, as this can easily cause damage or stunted growth and lead to plant death in some cases. Lastly, removal should be done when “substrate moisture is at an optimal level,” otherwise the root may break apart upon exit.

An example of a included a mobile transplanting line designed to improve production efficiency by using transplant plugs into the dibble holes. | W. Garrett Owen, OSU
3. Handling and Staging
Careful care and handling need to continue after the safe removal from the tray. Handlers should support the plant by the root ball and “avoid touching the foliage or stem.” Stress and damage from mishandling can “delay establishment, increase susceptibility to diseases, and result in uneven crop growth.”
For plants that require staging before transplanting, Owen recommends minimizing their time spent out of growing media, as “extended exposure of roots to air can cause rapid desiccation, especially in low-humidity environments or under direct sunlight.” Overly dry roots can limit survival rates, leading to crop replacement and all of the associated costs that come with it.
4. Optimizing Workstation Layout
Workflow organization and optimization can greatly improve efficiency, and thereby reduce the risks associated with plant damage. Ergonomic workstations can minimize unnecessary worker motions, especially when designed to reduce the distance and/or reach to needed materials and supplies. One example that Owen cites is “a mobile transplanting line designed to fill flats, brush excess substrate of the top, and dibbled transplant holes so staff could easily insert plugs.”
5. Substrate Preparation and Container Filling
The next step is preparing the new container for the plug or liner. A properly moistened substrate should be “evenly distributed throughout the cell pack or container to create a uniform growing environment.” If the substrate, or its moisture distribution, is uneven, it can lead to “dry spots or oversaturated areas.” Additionally, if the substrate is packed and compressed too tightly in the container, root growth can be restricted, drainage can be impeded, and an environment favorable to pathogens and diseases can easily be born. However, on the flip side, if the substrate is too loosely compacted, the plug or liner is prone to wilting and nutrient deficiencies, being unable to suck up what it needs from the substrate.
For the next several best practices steps to optimize the transplanting process, please read the full e-Gro (Electronic Grower Resources Online) alert “Best Practices for Transplanting Plugs and Liners for Spring Production.” Additional and current e-Gro alert pieces from Volume 14 (2025) can be found online.

