Older school-aged kids will use one point perspective to practice drawing a 3D illusion in this fun project. This technique can easily be used at home or in the classroom.
What is one point perspective?
One-point perspective is a drawing method that shows how things appear to get smaller as they get further away, converging towards a single “vanishing point” on the horizon line.
– Westmoreland Museum of American Art –
By using one point perspective, artists can direct the viewers attention to a certain area. Perspective also gives the illusion of depth, distance, size, etc. Once kids learn how easy it is to draw in one point perspective, they can use that knowledge to enhance future projects.
Related Link – Review our introductory lesson to one point perspective.
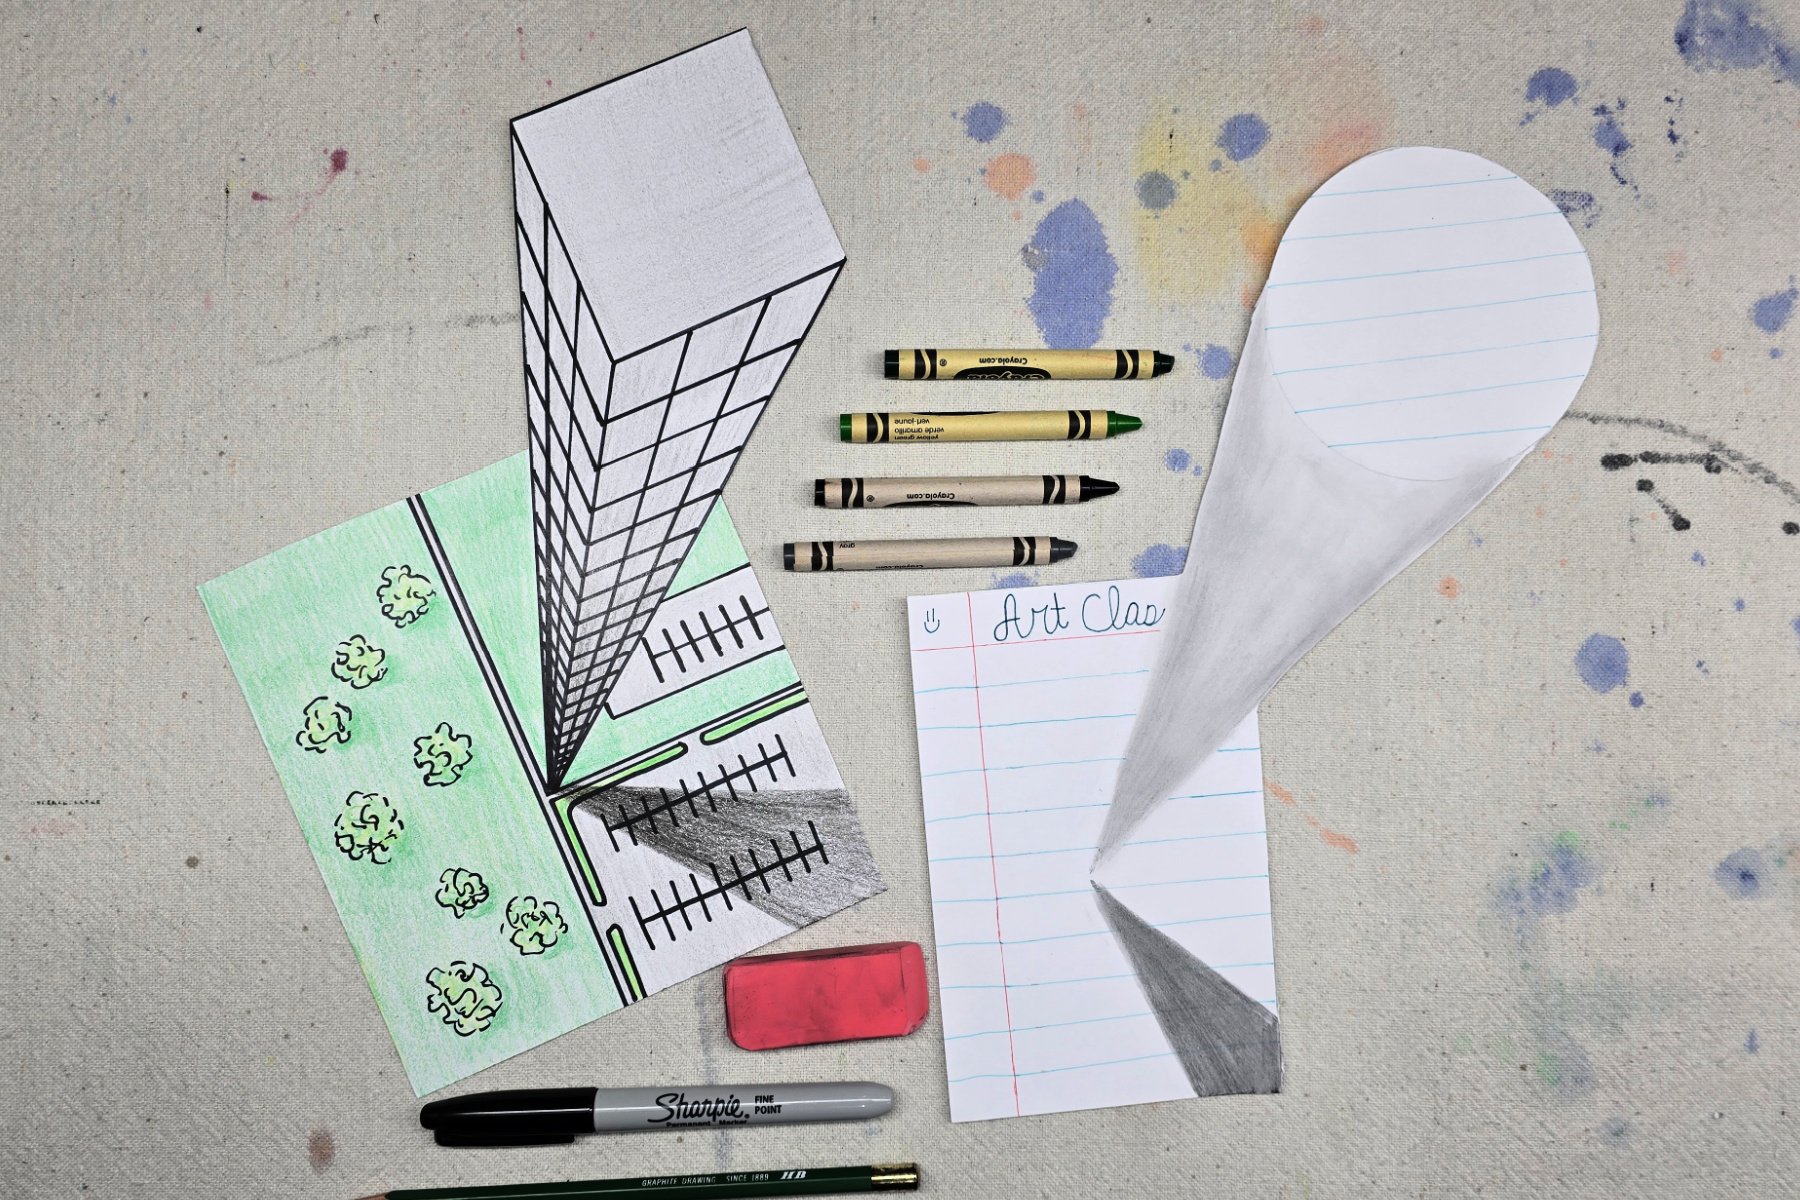
Supplies Needed to draw 3D Illusion Art

- White Cardstock
- Ruler
- Scissors
- Pencil
- Permanent Marker
- Colored Pencils, Crayons, or Markers
Directions to Drawing 3D Illusion Art
Step 1

First, use a pencil to lightly sketch a shape towards the top right corner of the page.
Step 2

Next, place a dot in the lower left portion of the page. This is your vanishing point. Draw lines from the vanishing point to the shape drawn in the previous step. Lines need to originate from the corners of the shape and converge at the vanishing point.
Step 3

Then, draw a large square around the vanishing point. This square should reach over halfway up the side of your 3D building or illusion. Draw squiggly lines on the outside of the square. These lines are to remind kids not to draw on this portion of the page since it will later be cut away.
Step 4

Lightly sketch the rest of the design.
Keep one point perspective guidelines in mind when drawing on the 3D illusion. Anything the kids draw on the sides of the illusion (such a building windows) need to be contained to their own perspective guidelines to enhance the illusion.
Drawings on the ground, or surrounding the illusion, do not use one point perspective. Draw these as if the viewer is looking down on the scene from above.
Step 5

Next, trace final sketch with a permanent marker and erase unwanted pencil lines.
Step 6

Then, use crayons or colored pencils to add color to your drawing.
Tip: Gradually color the bottom portion of the illusion shape darker to further imply it’s distance from the viewer.
Step 7

Using a darker color, draw a shadow being cast from the 3D illusion. This shadow needs to begin at the vanishing point and extend into the lower right portion of the page, mimicking the shape of the 3D illusion.
Step 8

Finally, cut away excess paper to complete the 3D illusion.
Finished 3D Illusion Art Project

I love how these projects really pop once they are complete! Since these projects are to be made on paper, they can easily be framed, clipped, or displayed in your preferred style.
Our Experience Drawing this 3D Illusion Art Project
This 3D illusion is such a fun project but I would recommend it for kids that are already familiar drawing in one point perspective or with simple shading techniques. This 3D illusion drawing is a perfect opportunity for kids to develop confidence in their perspective and shading skills. They can then apply what they have learned from this project to more elaborate creations in the future.
Prep Time
5 minutes
Active Time
25 minutes
Total Time
30 minutes
Difficulty
Medium
Estimated Cost
$1
Tools
- Ruler
- Scissors
- Pencil
- Permanent Marker
- Colored Pencils, Crayons, or Markers
Instructions
- Use a pencil to lightly sketch a shape towards the top right corner of the page.
- Place a dot in the lower left portion of the page. This is your vanishing point. Draw lines from the vanishing point to the shape drawn in the previous step. Lines need to originate from the corners of the shape and converge at the vanishing point.
- Draw a large square around the vanishing point. This square should reach over halfway up the side of your 3D building or illusion. Draw squiggly lines on the outside of the square. These lines are to remind kids not to draw on this portion of the page since it will later be cut away.
- Lightly sketch the rest of the design.
Keep one point perspective guidelines in mind when drawing on the 3D illusion. Anything drawn on the sides of the illusion (such a building windows) need to be contained to their own perspective guidelines to enhance the illusion.
Drawings on the ground, or surrounding the illusion, do not use one point perspective. Draw these as if the viewer is looking down on the scene from above. - Trace final sketch with a permanent marker and erase unwanted pencil lines.
- Use crayons or colored pencils to add color to your drawing. Tip: Gradually color the bottom portion of the illusion shape darker to further imply it’s distance from the viewer.
- Use a darker color to draw a shadow being cast from the 3D illusion. This shadow needs to begin at the vanishing point and extend into the lower right portion of the page, mimicking the shape of the 3D illusion.
- Cut away excess paper to complete the 3D illusion.
Notes
Drawing 3D Illusion Art Variations
- Complete project using other mediums such as markers, pastels, or paints.
- Practice drawing more detailed shapes in the 3D illusion that are popping out from various angles.
- Adapt this project to fit a seasonal theme or holiday.
Drawing 3D Illusion Art Variations
- Complete project using other mediums such as markers, pastels, or paints.
- Practice drawing more detailed shapes in the 3D illusion that are popping out from various angles.
- Adapt this project to fit a seasonal theme or holiday.
Other Fun Art Projects from Kids Activities Blog
Were your kids impressed with the end results of their 3D illusion project? What shape and design did they choose to draw?