Our easy red white and blue tie dye shirts are the perfect craft for the 4th of July, other patriotic events or everyday! We are showing how to make a child’s 4th of July tie dyed shirt which is great for kids of all ages and adults too. We love making tie dye crafts.
DIY Red White & Blue Tie Dye Shirts
We are using a sugar tie dye technique that can be customized for a million uses. We just happen to be making 4th of July Tie Dyed T-shirts for the entire family.
Related: Make DIY American Flag Shirt
Sugar tie dye technique is a fun way to tie-dye anything. Aside from t-shirts, you can also use this method to tie-dye shorts, dresses, and so much more!
This article contains affiliate links.
Supplies Needed to Sugar Tie Dye a Shirt
Directions to Make 4th of July Tie Dye T-Shirts

Step 1
Start by prepping the surface you are working on by laying down newspaper. I suggest doing this craft outside and covering the table you are working on with several layers of newspaper. Next, make sure you and your child are wearing old clothes you don’t mind getting dye on. Anything the dye touches, will be stained.
Step 2
Now it’s time to get your t-shirts ready. Lay the t-shirt flat out on the newspaper surface and place the piece of cardboard inside of the shirt. This helps the dye from soaking the other side.
Step 3
Take a paper towel and soak it into the water. Wring it out so the paper towel is damp. Then start applying pressure onto the area you plan to place a design on the t-shirt. You just want the t-shirt to be damp and not soaked.
Step 4
Next, take your template (we used a wooden peace sign) and place it onto your t-shirt.
Using a spoon (or your hands) carefully place sugar on the outer edge of the wooden template. You basically want to be left with an outline of the template.
Carefully lift the template without disturbing any of the sugar.
Step 5
Put your gloves on and take one of your dye spray bottles and shake well. We used a combination of light blue, dark blue, and red but you can use whatever color you like.
Carefully spray on top of the sugar and inside of the area where the template was. This will give a very cool effect once it’s done!

If you want to add a bit more color, you can tie random sections of the shirt using rubber bands (be careful not to disturb the middle where the sugar is). Once tied, you can spray using other colors. These will give sort of a firework effect once dried.
Step 6
Allow to dry for 6-8 hours. Once dry, carefully dust away the sugar and remove any rubber bands you may have placed on the t-shirt.
(Optional) Step 7
If you use the SEI tie dye then Tumble Dry, this type of dye needs to be heat set (if you buy a different kind, follow the directions on that).
Basically you dry on a high heat in the dryer or use an iron to heat set the dye. Once heat set, you can wash and dry as normal.

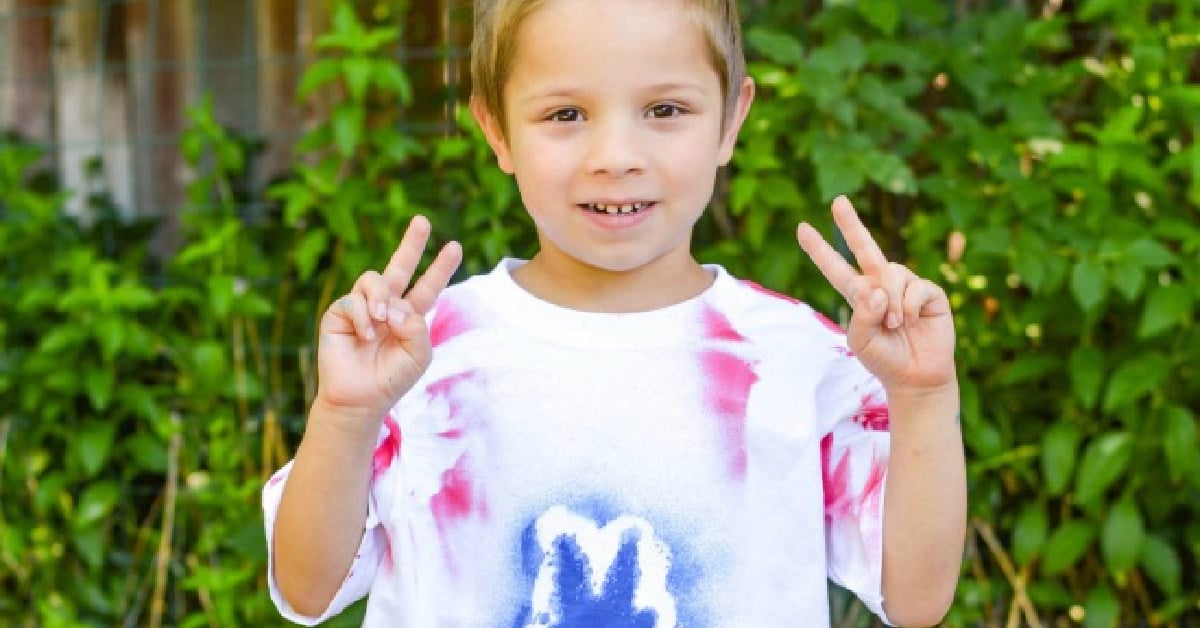
Finished REd White and Blue Tie Dye T-Shirts
Allow your kids to wear their new 4th of July Tie-Dye T-shirts!
See, wasn’t that fun?
Active Time
30 minutes
Total Time
30 minutes
Difficulty
Medium
Estimated Cost
$15
Materials
- Extra Fine Granulated Sugar
- White T-shirts (cotton seems to work best)
- SEI Tumble Dye or Tulip Spray Dye Kit
- Rubber Bands
- Wooden Template (we used a peace sign)
Tools
- Piece of Cardboard
- Newspaper or plastic covering for workspace
- Gloves
- Spoon
- Old Clothes (anything you don’t want to get dye on)
- Paper Towels
- Bowl of Water
Instructions
- Lay t-shirt on newspaper or plastic covering of your workspace and add cardboard inside shirt.
- Soak paper towel in water and wring out. Apply pressure to the damp paper towel over the surface of the t-shirt.
- Take your design template and place it where you want it on your t-shirt.
- Sprinkle sugar around the template with your hands or a spoon.
- Lift template without disturbing the sugar.
- Wearing gloves, take your first color of tie dye in a spray bottle and shake well. Spray on top of the sugar.
- Using rubber bands, tie off and dye different places on the shirt to give a fireworks effect just don’t disturb the middle where the sugar is.
- Dry for 6-8 hours then remove rubber bands and sugar.
- Follow dye instructions if need to heat set.
Watch Our Video Tutorial to Tie Dye Red White & Blue T Shirts
Notes on Sugar Tie Dye
I really loved using sugar in this project because it was really different than many of the tie-dye projects you see on the web. The sugar gives a really neat subtle effect on the shirt.
Related: More fun and easy sugar tie dye projects
The best part is, you can use this technique to draw out your own designs and even place it randomly on your project.
Making Tie Dye Shirts with Kids
This is surprisingly easy and can be done with kids of all ages.
- Younger kids will need a lot of assistance and you may want to do this on the back porch or bathtub.
- Older kids will get strategic about tie dye patterns and how different folds and twists affect the final tie dye shirt.
More Tie Dye from Kids Activities Blog
How did your red white and blue tie dye t-shirt turn out?