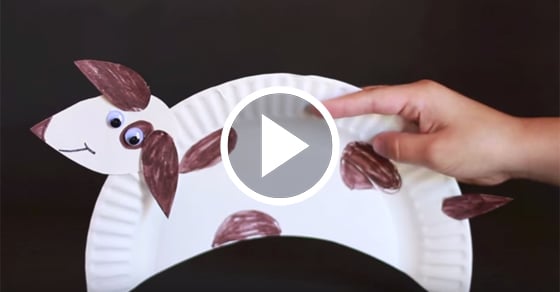
This paper plate dog crafts are perfect for children of all ages. Especially smaller kids like preschoolers and kindergarteners. Young children like toddlers can probably do this, but may need some assistance from an adult. This simple craft is great for all dog lovers and is so much fun to do.
Paper Plate Crafts: Puppy Dog
Kids love to make paper plate crafts because there are just so many possibilities! Today we are going to turn one into a cute puppy dog.
While my dog is tan and brown, you can pick whatever color you like. You can make your own dog, a different dog, or maybe some big dogs like a particular big red dog we all love. Make all the puppy dogs you want! If you prefer not to paint, use crayons to color your paper plates instead.
The best part the supplies you need for this paper plate dog craft is minimal. So grab your glue stick and other craft supplies to start these dog crafts.
This post contains affiliate links.
Related: Love dogs? Then try making this super cute origami dog craft!

Want to see how to make this easy craft? Then check out this paper plate dog craft video! It’s a great way to see the steps in case anything is unclear. It’s such a fun craft.
Video: Paper Plate Dog Craft
Supplies Needed To Make This Super Cute Paper Plate Dog Craft
Supplies:
Tools:
How To Make This Easy Activity: Paper Plate Dog Craft

Step 1
Cut the paper plate in half.
Step 2
Use the pattern to cut the shape of the dog’s body from one half of the plate.
Step 3
Paint the body tan.
Step 4
Paint the piece you cut from the body tan. Also, paint each end of that piece, one end red, the other end brown (to be used for the tongue and ear).
Step 5
Paint the center of the second half of the plate tan.
Step 6
When dry, use the patterns to cut the pieces (brown = ear, red = tongue, tan = tail & head).

Step 7
Attach the ear to the head (roll a piece of tape sticky side out) and tape the tongue to the back of the head.

Step 8
Use the handle end of a paintbrush dipped in black paint to add the nose. Alternatively, you could use a black marker or a black pom pom.

Step 9
Use a black marker to draw on the paws.
Step 10
Use brown paint to add spots on the dog’s back and tail.

Step 11
Let everything dry completely.
Materials
- Paper Plate
- Tan Paint
- Black Paint
- Brown Paint
- Red Paint
- Wiggly Eyes
- Tape
- White Glue
- Glue stick
- Black Marker
Instructions
- Cut the paper plate in half.
- Then cut the shape of the dogs body from one half of the plate.
- Paint the dog’s body tan.
- Paint the piece you cute from the body tan as well. Then paint each end piece. On end red, and the other end brown.
- Paint the center of the second half of the plate tan.
- Then when it is dried cut out the tong, ear, tail, and head.
- Attack the ear on the head and the tongue behind the head. You can use tape for this.
- Use the paintbrush to paint the nose. The nose should be black. You can also use a black marker.
- Use a black marker to make the paws.
- Use brown paint to add spots to your dog.
- Let everything dry.
More Fun Paper Plate Crafts From Kids Activities Blog:
Looking for more simple paper plate crafts? We have so many to choose from and they’re all easy peasy! So grab your glue sticks, paper plates, and a pair of scissors and be prepared for a lot of fun!
How did your paper plate doggy craft turn out? Do you think it is one of the dog crafts?

